As part of my AI learning journey, I recently installed Stable Diffusion (SD) on my RTX 4070 laptop. With no prior experience in AI or coding, I wanted to see how far I could get with ChatGPT’s help.
Here’s what I learned — the good, the frustrating, and the surprisingly funny parts.
💻 Step-by-Step Recap of Stable Diffusion Installation on My Laptop
On August 1, 2025, I installed Stable Diffusion WebUI (AUTOMATIC1111) on my laptop running:
- 🧠 CPU: Intel Core i7-13700HX
- 🧮 Memory: 64GB RAM
- 🎮 GPU: NVIDIA RTX 4070 Laptop GPU (8GB VRAM)
- 💻 OS: Windows 11
I followed step-by-step instructions (with the help of ChatGPT) and documented the entire process so others like me can try it without needing any prior experience in AI or development.
🔹 Step 1: Installed Prerequisites
I started by downloading and installing:
- Python 3.10.6 (64-bit)
🔹 Important: I checked “Add Python to PATH” during install - Git for Windows
These are needed to run and manage the WebUI locally.
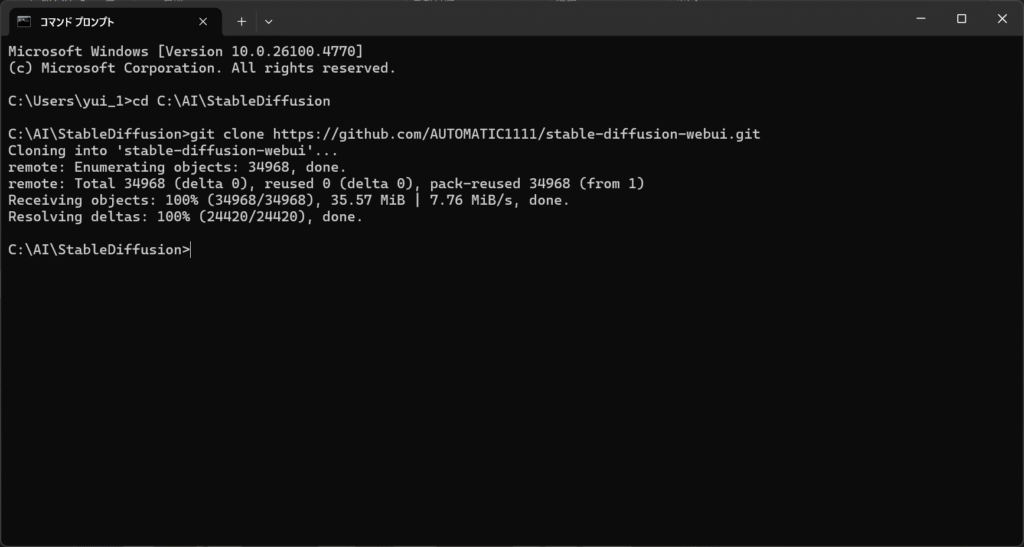
🔹 Step 2: Downloaded Stable Diffusion WebUI
I created a folder at:
C:\AI\StableDiffusionThen I opened Command Prompt and cloned the official AUTOMATIC1111 repo:
cd C:\AI\StableDiffusiongit clone https://github.com/AUTOMATIC1111/stable-diffusion-webui.git
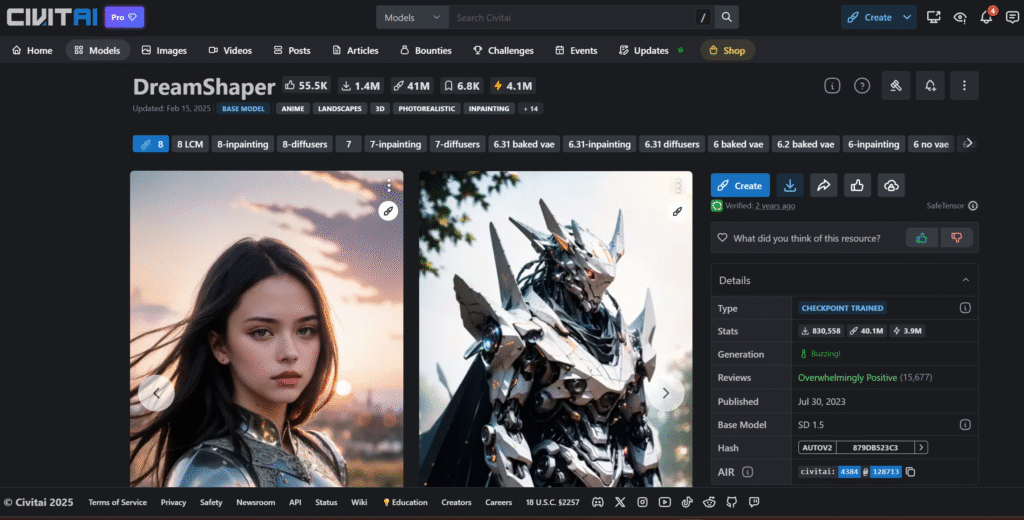
🔹 Step 3: Downloaded a Model
After the installation, I downloaded the Dreamshaper model from CivitAI:
- File format:
.safetensors - I placed it into:
stable-diffusion-webui\models\Stable-diffusion\
🔹 Step 4: Launched Stable Diffusion
I created a shortcut on desktop for webui-user.bat file located in the main install folder (below) and double click the shortcut to launch SD:
C:\AI\StableDiffusion\stable-diffusion-webui\webui-user.bat
After a few minutes of setup, the WebUI loaded at:
http://127.0.0.1:7860/
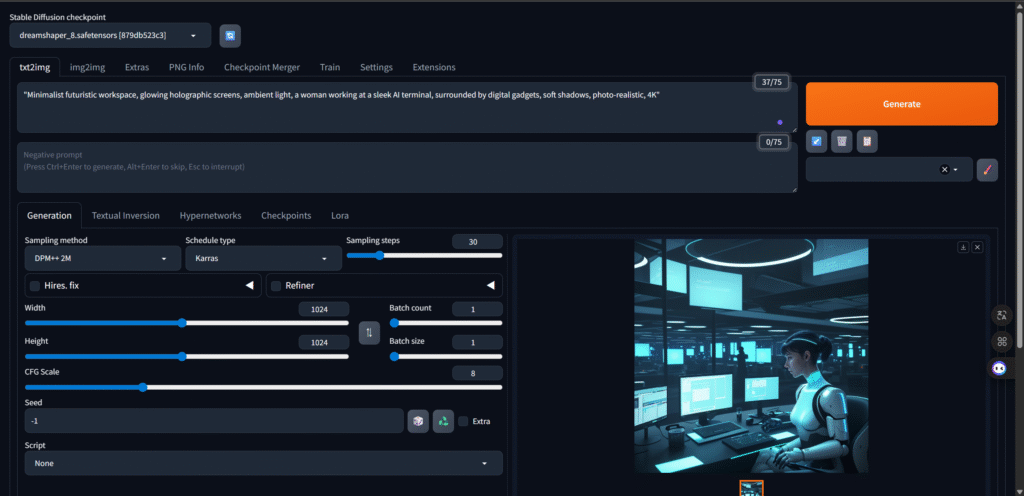
🔹 Step 5: Generated My First Image
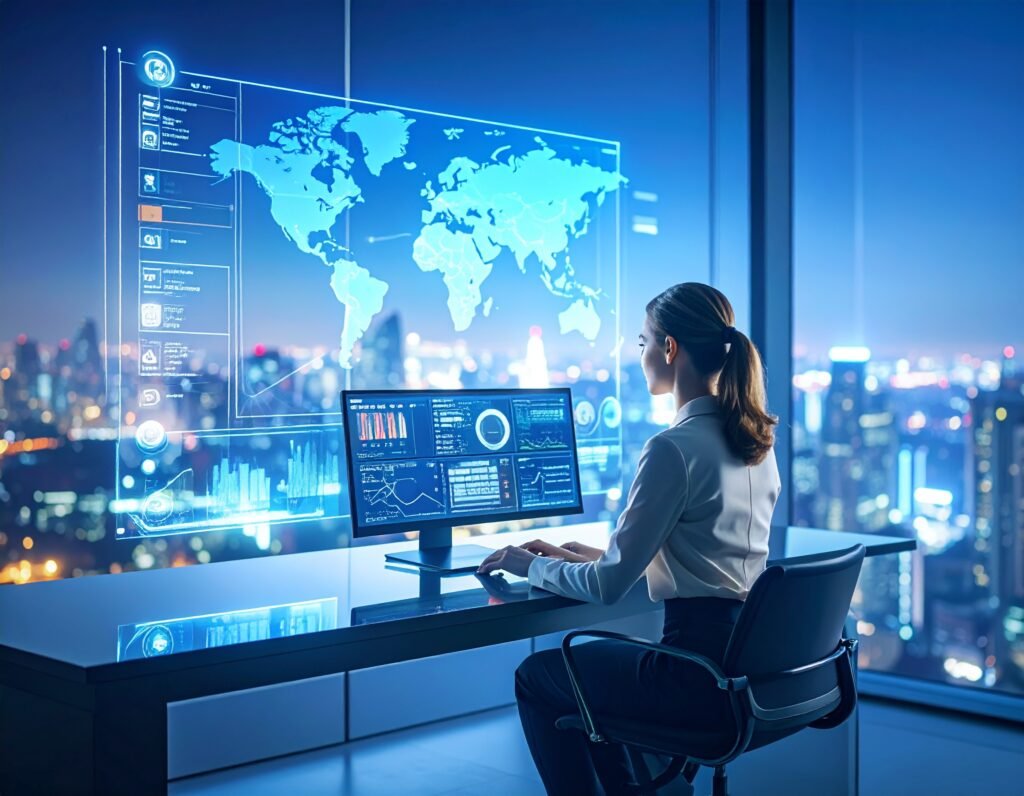
Here’s the prompt I used that gave me the best result:
Prompt:
“Minimalist futuristic workspace, glowing holographic screens, ambient light, a woman working at a sleek AI terminal, surrounded by digital gadgets, soft shadows, photo-realistic, 4K”
I used the Dreamshaper model to generate this.
🔹 Lessons Learned
I also tried other models like RealisticVision and aZovyaPhotreal, but didn’t get the results I hoped for. Especially with human figures, I noticed visual glitches (weird limbs, distorted poses).
It made me realize that:
- Each model has its own strength and style
- Not all prompts work well with every model
- Generating realistic people still has limitations in local SD
Interestingly, when I used the same prompt in Adobe Firefly, the output still showed human body imperfections, but overall detail was significantly more polished — something I’ll be exploring in a future post.
🧪 What I Tried
I experimented with multiple models and prompts:
Models I tested:
- RealisticVision v6
- aZovyaPhotreal
- Dreamshaper (best result)
Prompts I tried:
- Minimalist futuristic workspace
- Cyber-inspired smart city
- Abstract neural network
- Notebook on desk scene
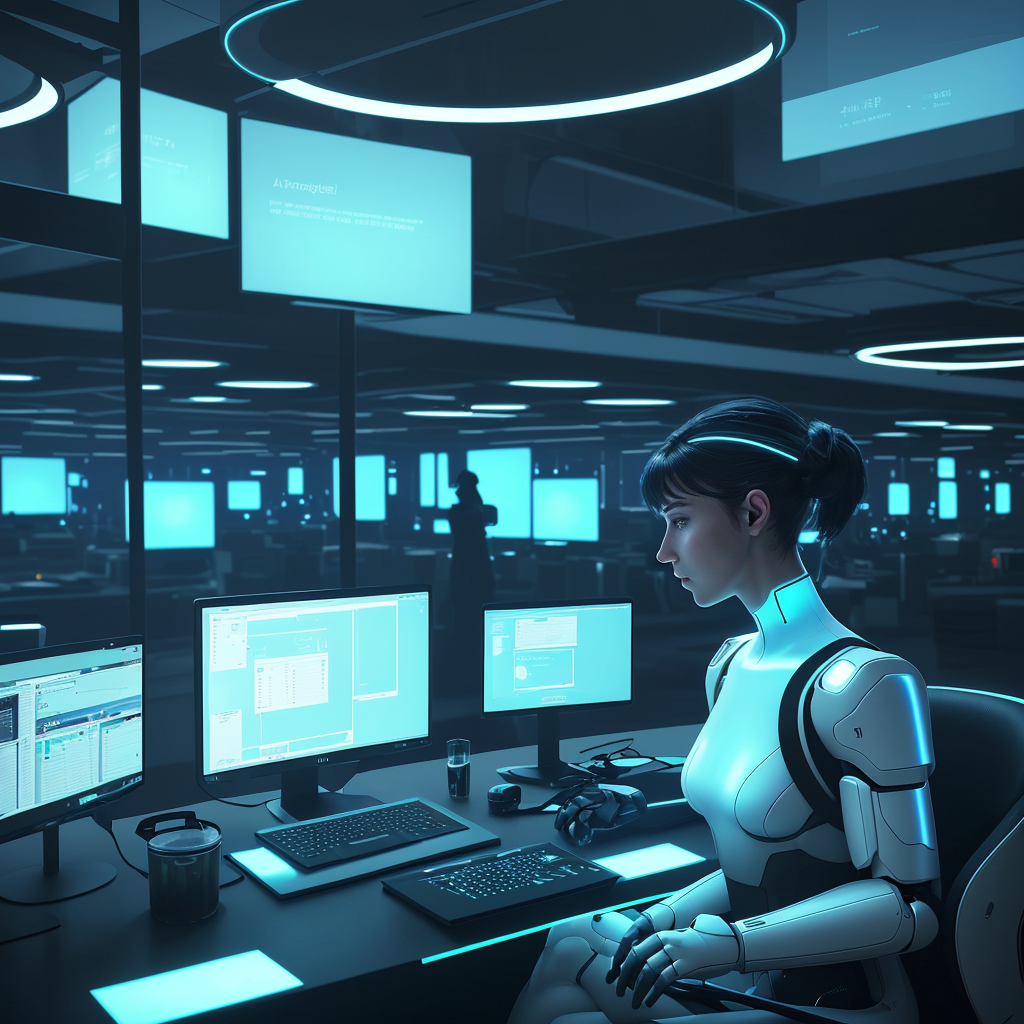
Most of them didn’t produce the results I expected, especially when trying to generate human figures. In fact, even the image I selected for posting had a weird leg…
🧠 My Honest Takeaway
After spending hours experimenting, I walked away with a few unexpected but valuable lessons.
First, here are the prompts I actually tested during my image generation:
- Minimalist futuristic workspace
“Minimalist futuristic workspace, glowing holographic screens, ambient light, a woman working at a sleek AI terminal, surrounded by digital gadgets, soft shadows, photo-realistic, 4K” - Cyber-inspired smart city
“Cyber-inspired smart city skyline at dusk, glowing data streams across buildings, digital billboards, ambient purple and blue lighting, photorealistic style, cinematic look, ultra-detailed” - Abstract neural network
“Abstract visual representation of artificial intelligence, neural network made of light, glowing connections, dark background, cinematic lighting, ultra high detail, 8K” - Notebook on desk scene
“Desk scene with open laptop, handwritten notes, AI diagrams on screen, coffee cup, natural window light, soft-focus background, realistic lighting, warm tones, photography-style”
Among all these, the first prompt — the futuristic workspace — gave me the best result using the Dreamshaper model. But even that image had some visual quirks (one leg looked strange), which seems to be a common issue when generating humans with local SD models.
I also tested RealisticVision and aZovyaPhotreal, but I found that they either lacked detail or didn’t interpret my prompts as clearly as I hoped. It became obvious that different models specialize in different image types, and choosing the right one makes a big difference.
💬 “Prompting isn’t just about typing words. It’s how you translate your imagination into code the AI can understand.”
That quote sums it up.
I’ve come to realize that prompting is not optional — it’s essential. How you phrase your prompt — the level of detail, the tone, the focus — dramatically affects the result. A single misplaced word or vague phrase can confuse the model. Even though I used the same prompts across different platforms (like Adobe Firefly), I noticed that Firefly interpreted my intent more accurately, while SD often needed extra tweaking.
So is prompting the most essential part of AI image generation?
I believe it is — at least at this stage of AI’s development. Models are powerful, but they still rely entirely on your ability to communicate clearly and precisely. It’s a skill I plan to keep improving.
This experience has taught me that prompt crafting is part art, part science — and definitely a key skill for anyone learning AI tools.
🔍 What I’ll Explore Next
- How different models interpret prompts
- Pros and cons of local SD vs. Adobe Firefly
- How to fix or upscale images with minor defects
- Which tools are truly beginner-friendly for AI creatives
🎯 Closing
This is just the beginning of my AI learning journey. I’ll continue sharing my findings — both the wins and the “what-the-heck” moments.
📱 Follow me on Instagram or X for updates
📩 Or subscribe to my blog for the full journey
Podcast: Play in new window | Download